Setup
Setting up and creating an Angular application involves several steps, from installing the necessary software to initializing and running your first Angular project. Here's a detailed guide:
Prerequisites
Before you start, ensure you have the following software installed:
-
Node.js:-- Angular requires Node.js as a runtime environment. It's recommended to install the latest stable version of Node.js from nodejs.org.
-
NPM (Node Package Manager):-- It typically comes with Node.js installation. NPM is used for managing packages in the Angular environment.
Step-by-Step Guide to Create an Angular Application
1. Installing Angular CLI
Angular CLI (Command Line Interface) is a powerful tool to initialize, develop, scaffold, and maintain Angular applications.
- Open your terminal or command prompt.
- Install Angular CLI globally using NPM by running:
npm install -g @angular/cli
2. Creating a New Angular Project
-
In the terminal, navigate to the directory where you want to create your project.
-
Use Angular CLI to create a new project by running:
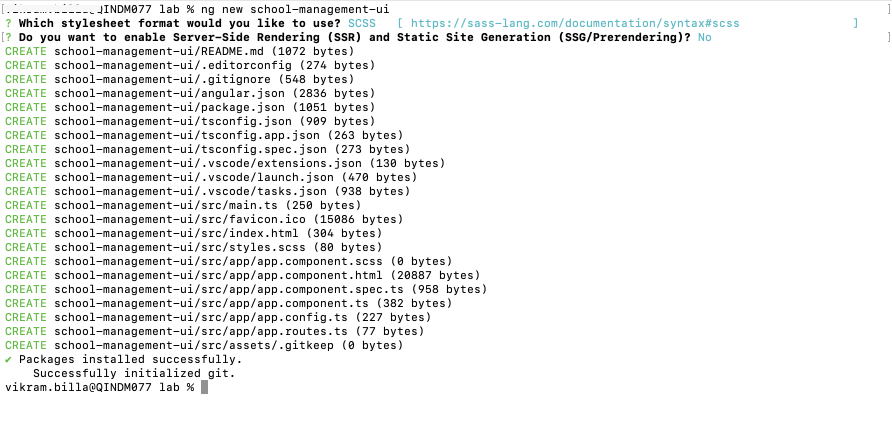
ng new your-project-nameReplace
your-project-namewith your desired project name. -
The CLI will prompt you for information about features to include in the initial app project. You can choose to add routing and select the stylesheet format (like CSS, SCSS, etc.). Below list of images will demonstrate about the steps


3. Running the Development Server
-
Navigate into your project directory:
cd your-project-name -
Start the development server using Angular CLI:
ng serve -
By default, the development server starts on
localhost:4200. Open your browser and navigate tohttp://localhost:4200/. You should see your new app running.
4. Basic Project Structure
When you open the project in an IDE or a code editor (like Visual Studio Code), you'll see several files and folders:
src/app:-- This folder contains your app's logic and data. Angular components, templates, and styles are here.src/index.html:-- The main HTML file. Angular will automatically update this file with the necessary scripts.angular.json:-- Configuration file for Angular CLI.package.json:-- Lists the dependencies and scripts for your project.
5. Building and Deploying
- To build your application for production, run:
This command creates a
ng build --proddist/folder in your project directory containing the build artifacts.
6. Further Development
- To add new components, services, etc., use Angular CLI commands like:
These commands scaffold basic files for your components and services.
ng generate component component-name
ng generate service service-name
Additional Tips
- Version Control:-- Consider initializing a Git repository in your project directory to manage version control.
- Learn TypeScript:-- Angular uses TypeScript, so familiarity with TypeScript is beneficial.
- Explore Angular Documentation:-- The Angular official documentation is a great resource for learning and troubleshooting.